How to Measure Your Jacket Using Measurement Tape
Jackets are a much-needed product nowadays, and most people get the wrong size after shipment and get uncomfortable when they wear them on their favorite occasions.
Many people have no idea how to measure a jacket and mismeasure it. Therefore, we will guide you through how to measure a custom leather jacket perfectly with our simple steps. First, clear your surroundings and put your used jackets on a smooth surface.
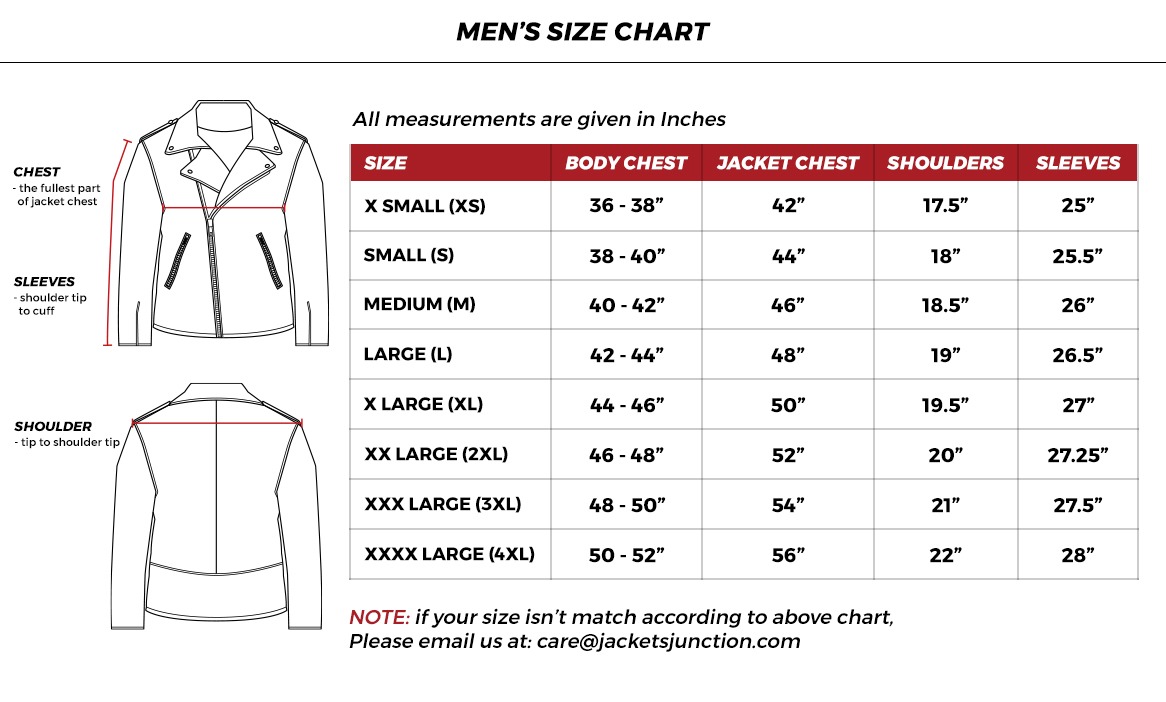
MEN’s Measurement Guide
First Step
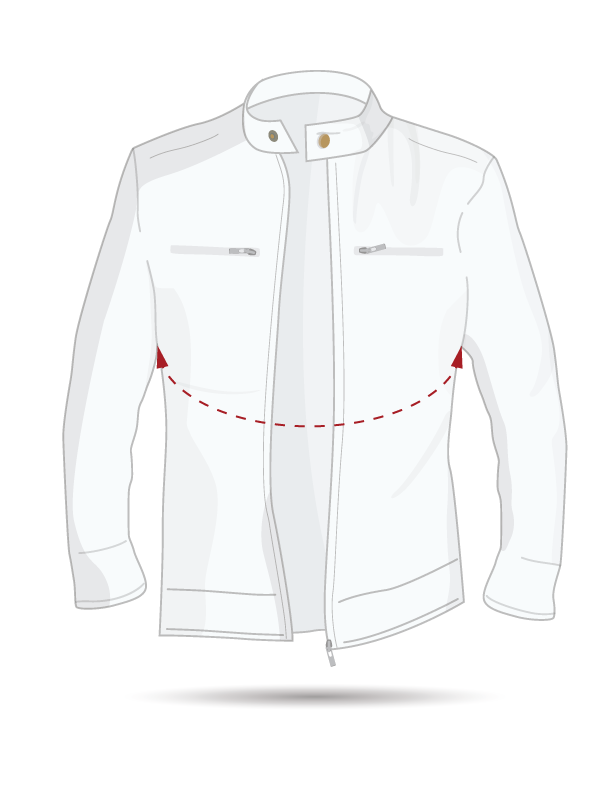
Chest Width:
To measure the chest size, first flatten all the wrinkles on a jacket, place your measuring tape below the sleeves and measure it from the left edge to the right edge.

Second Step
Waist Width:
Place the measuring point at the waist part of the jacket and measure from the left edge to the right edge. Multiply this measurement by two, e.g., if the size is precisely 19 inches, we will multiply it by two, making it 38 inches.

Third Step
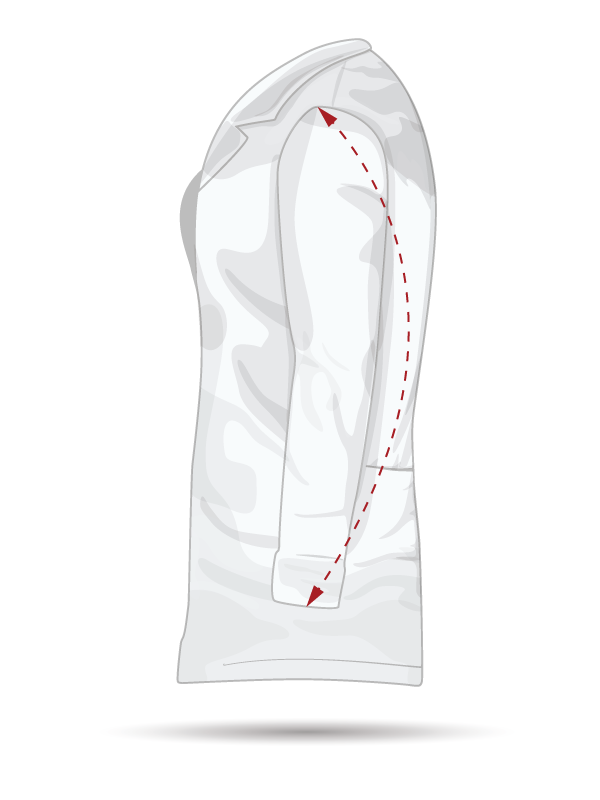
Sleeve Length:
Place the measuring tape at the shoulder seam, then drag it down at the end of the cuffs.

Fourth Step
Shoulder Length:
Put the measuring tape on a starting point from the left edge of the shoulder till the right edge where the shoulder meets the sleeve.
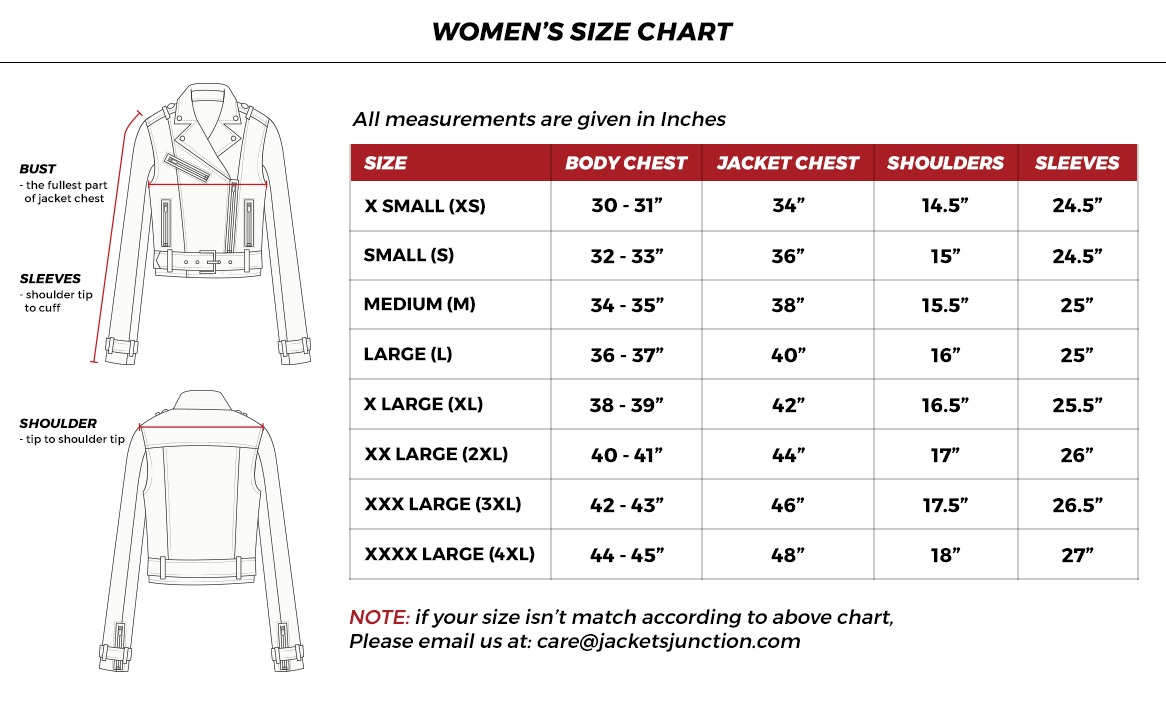
Women’s Measurement Guide

First Step
Chest Width:
First, flatten all the wrinkles on the jacket, put it on a smooth surface, place the measuring point below the sleeves (the endpoint of armhole), and measure from the left edge to the right edge.

Second Step
Waist Width:
Place the measuring point at the narrowest point of the jacket and measure it from the left edge to the right edge. Multiply this measurement by 2.
Third Step
Sleeve Length:
Place the measuring tape at the starting point of the sleeves, then slog it down at the end of the cuffs.
Fourth Step
Shoulder Length:
Place the measuring tape from the starting point of the shoulder and measure it from the left edge to the right edge.